Screw retained dental bridges on dental implants
Everyone knows what a dental implant is: a screw type piece (usually made of titanium) that is inserted into the bone, replaceing the root of a missing tooth. After a few months, a crown will be placed on top of this implant so the aesthetic and function can once again be regained. The way that the crown is fitted on top of the implant is facilitated by another piece (made of titanium or zirconium) called abutment.
So, we have three components to help replace a missing tooth - the dental implant screw, the abutment and the crown.

Let's take a look at these components and the way they connect:
The dental implant is inserted into the bone and the abutment is screwed inside the implant. Usually, the crown will be cemented on the abutment one piece resulting out of these three and... we have a new tooth.
BUT, and now comes the "but"... What happens if the screw gets loose or we have some problems under the crown? What happens if we are talking not only about one crown but about a bridge with multiple units? How can the dentist act regarding whatever might happen under that bridge? Well... it is impossible without cutting off the bridge and removing it without the possibility of reusing it afterwards. All that means a waste of time and money, a waste of hopes...
In addition to this, how can the patient maintain a proper oral hygiene under this bridge?
WELL... how about not cementing it? how about the possibility of removing the bridge and reusing it when needed? How about this without any cons? It can be done! The solution is that (do you remember the three components of a dental implant?) the abutment and the crown should be in one piece and this piece will be screwed into the dental implant. Now, we can clean the bridge, the soft tissue and the implants by the dental hygienist and if any problems occur, a specialised intervention is simplified without compromising the dental bridge.
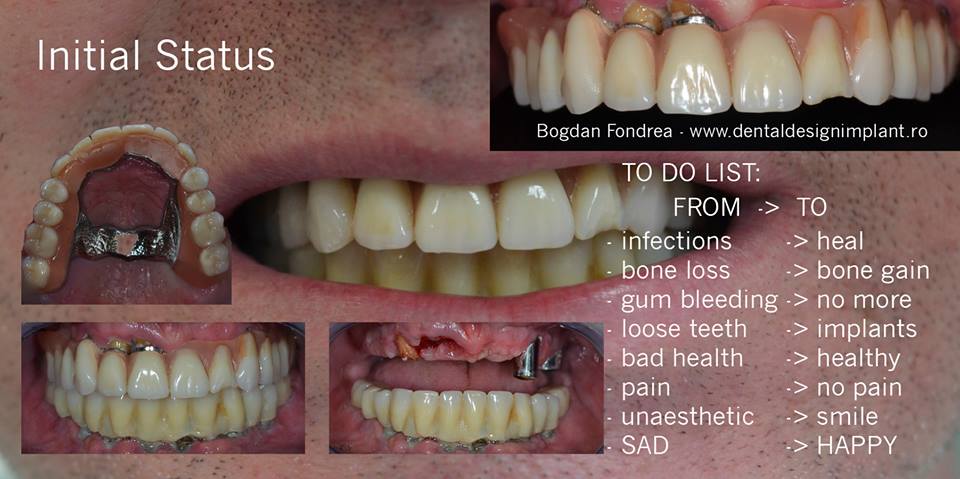
What can be seen in the first image of the case is that due to bad cleaning and the fact that the lower bridge was cemented and the telescopic superior bridge was not cleaned properly, the patient had multiple bone infections, teeth infections, bone loss and gingival bleeding. The previous implants were compromised and so were the natural teeth. The plan was to regain health of the bone and the soft tissue and place other implants and rethink the final prosthetic work - screw retained bridges.
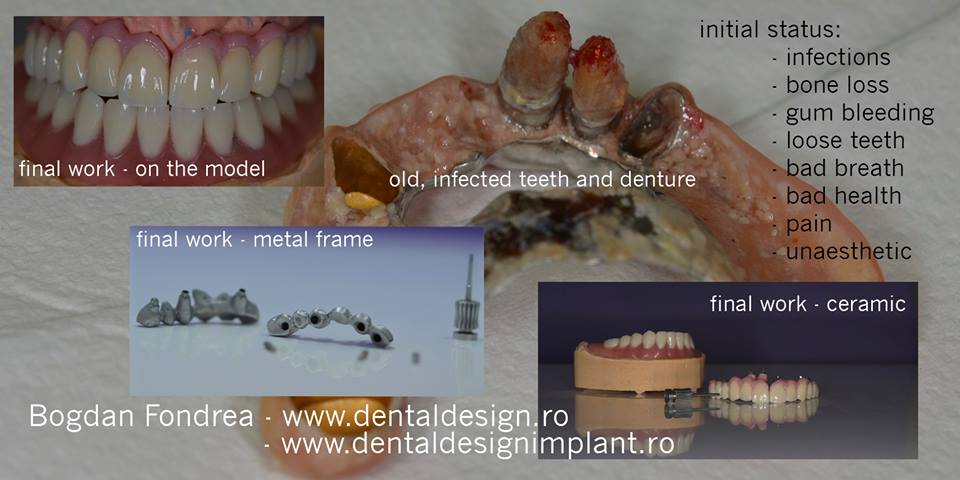
The second picture shows the first telescopic denture that was removed together with the infected teeth, and three small pictures with the final work. On the lower jaw we placed a temporary denture and only in a few months we can place the final ceramic bridges on the dental implants safely.
The third picture shows the final upper jaw work with screw retained dental bridges on dental implants.
Conclusion: The final result is does not only consist in the evaluation of the status at the time of placing the denture, but also keeping the future use and health of the patient in mind. Smile now, but smile tomorrow too! 😉
Dr. Bogdan Fondrea - www.dentaldesign.ro